We expect at least some of sticker lovers here! However, this article for those who do not satisfy the pre-designed and printed stickers, available in our market as well who have that minimal creative talent to design your own sticker and use it for enhancing your visual satisfaction. Here, stickers are not only those crazy ones but also useful forms such as business cards, post cards, CD or DVD Labels or some delivery address of your product, you would like to ship, etc. Thank Microsoft! You do not have to download and install any other tools, if you are using either Microsoft Word 2007 or Word 2010. We hope that most of you do not know about the feature in this famous word processing tool for making your own stickers, which can be used for several processes, like mentioned above. As you can guess, the designing and printing process do not consider your high-end technical knowledge, as using Microsoft Word is a simple job, in all aspects. Instead, we make use of Microsoft’s pre-installed templates for the purpose. Hope this article will be useful for people, who would like to add creativeness into his services and works.
Read: Tips to choose best printers
Step One
For using Built-in templates feature of Microsoft Word, you have to click on the Mailings Tab of tools section of Microsoft Word 2007. In the left side, you can see two options: Labels and Envelops. After deciding what you would like to create through this feature, you can select any of these options. For instance, if you want to create an envelope, containing an address, you should click on the Envelops tab.
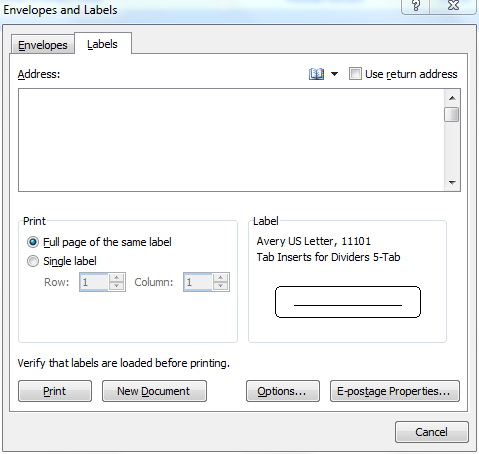
In seconds, you can see a pop-up window, consisting of some options as well as two tabs: Labels and Envelops, where the section Labels is selected. In case if you want to take printout of a delivery address, you should type the address to the corresponding section whereas you can skip this step in all other cases. However, you can also try importing a delivery address from your Microsoft Outlook Contact List. In addition, you should select either Full page of the same label or Single Label from the ‘Print’ section. If in case, if you have selected the second option, you should provide details about the column and row of label, which you would like to print.
Step Three
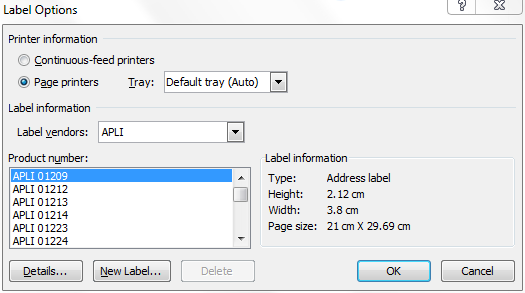
As you can see under the section ‘Label’, details of current label are given. As you can observe, the label uses Microsoft series along with the size. Now, it is the time for customizing your label by opening the ‘Options’ button. This will open a new sub-window like in the following image.
Step Four
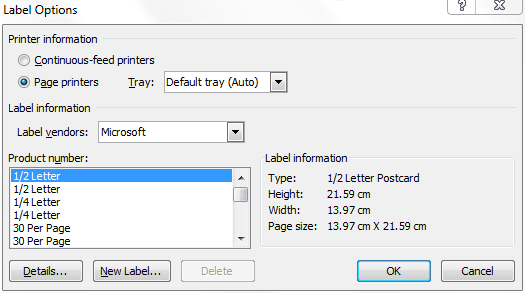
As you can see in the window, there are several options available for customizing your label with many options. First, you can change the brand, whose labels you would like to use. Current choice is Microsoft but there are various options such as Avery, Post-it etc. Once you have selected your desired brand of labels, you can go through a large list of product numbers and select the suitable one, according to your choice and purpose. Once you have selected these details, you can hit ‘OK’ that will return you into the previous dialogue box.
Final Step
The next step, as you can guess, is to hit the print button for taking printout of your customized label. However, if you would like to multiple labels in one sheet, you will have to redo the process after selecting appropriate rows and columns. In addition, if your Microsoft Word has not much in-build templates, you can download from the large collection of Microsoft, done by creative artists.
Conclusion
Here, we have mentioned an easy way for printing stickers from Microsoft Word. However, you can use 24HourPrint.com for printing stickers, without spending that much time. What do you think about this less-know feature in Microsoft Word? Let us know via comments.


