GNU Image Manipulation Program aka GIMP is the best free alternative to Photoshop. One could install plugins without breaking a sweat in the past as there was a registry. Now that it’s gone, finding suitable plugins is a mess. Imagine the pain when you want to install a GIMP DDS plugin then.

We believe you know what a DDS file is. Created by Microsoft for their Direct X SDK, it is a raster image format, sometimes used by people for digital photos. GIMP is unable to create or work with DirectDraw Surface (DDS) files. That’s why you need a plugin for that.
How to Install GIMP DDS Plugin?
We have already told you it’s a tedious process to stumble upon the best GIMP plugin. With the registry gone, finding a plugin that gets the job done is a herculean task. When it comes to DDS, the story isn’t different either. That’s why we are here to help you out.
Without further ado, let’s jump straight into the significant part of this article. Make sure you follow all the steps given below.
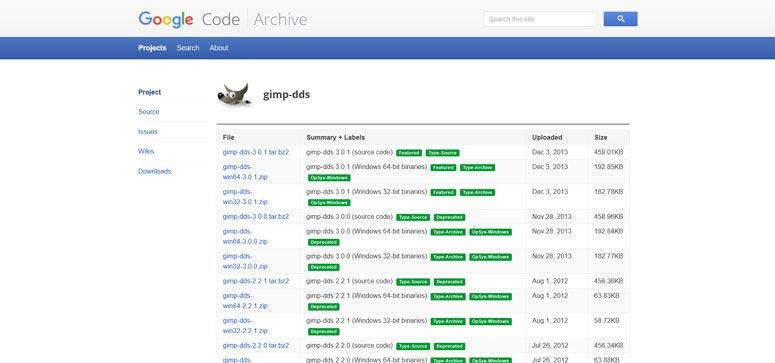
Step 1: Click here to visit the page where you can download the plugin. Or else, you can just search for the GIMP DDS plugin and click the first result.

Step 2: The page hasn’t been updated since 2013. Don’t worry, the plugin still works. What you see is an official webpage from Google. You have to make a selection based on the operating system and the system configuration. Once you do that, a download process will start.
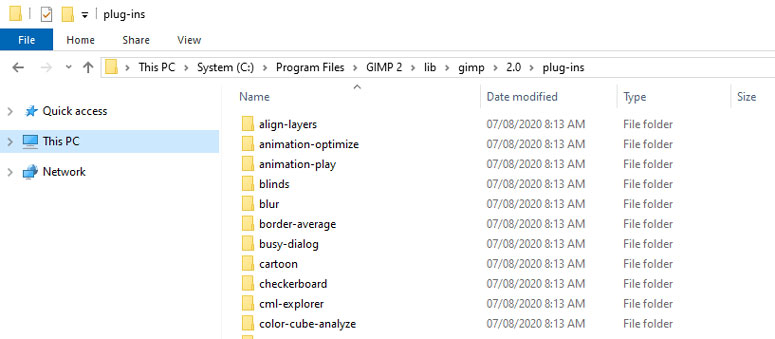
Step 3: Go to the Downloads folder and extract the content of the compressed file you just downloaded into the following location. Or you can extract the file into the desktop or any folder and then move the same to the given directory.
C:\ProgramFiles\GIMP2\lib\gimp\2.0\plug-ins

Point to Ponder:- Not all computers have the same folder for GIMP plugins. Based on the disk drive where the OS resides, the path may be subject to change.
Step 4: Once you paste the files, open GIMP up. You can now save and work with the DDS file format.
Voila, you just did something that you thought was impossible. Don’t be ashamed to pat yourself on the back. You just made GIMP capable of working with DDS files. That’s not enough.
Wondering how you can save a file with the DDS format? Have a look at the small guide given below.
How to Save a File on GIMP in DDS Format?
Now that you have installed the GIMP DDS plugin, it can open such files. Moreover, you can also work with them as well. Here, we are going to walk you through a few steps, which when followed, one can save files with the DDS extension.
Step 1: Open GIMP. We know you don’t want help with this step.
Step 2: Now you have to open an image that you like to edit. After opening it up, don’t forget to make all the modifications.
Step 3: Go to Save as option. When naming, don’t forget to give .dds at the end and click Save.
There you go! You have just created a DDS file in GIMP. What about opening up the same type of file? Send your glance below. We have added the information under in the FAQ section.
Frequently Asked Questions
● Where are plugins located in the GIMP app on Windows?
Based on the architecture and operating system, the location may vary. However, on most of the Windows computers, you can find GIMP plugins in C:\ProgramFiles\GIMP2\lib\gimp\2.0\plug-ins.
● How do I open a DDS file in GIMP?
Just like you open any other file in GIMP. You can either right-click on the file and choose to Open it with GIMP. Or you can open the software and get the Open dialogue box to browse to the specific file.
Conclusion
We have shared with you the best GIMP DDS plugin. Moreover, we helped you with opening and saving in DDS format. Do you happen to know another plugin to do the same purpose? Don’t forget to leave a comment down below.

